

Make these Easy 3D Papercraft Hexagon Gift Boxes

Looking for a gift box SVG that’s easy to make and perfect for special occasions? These Hexagon Gift Box SVGs are a fun and versatile 3D papercraft project you can make in approximately 20-30 minutes, making it ideal for beginners and experienced paper crafters alike.
Whether you need handmade packaging for birthdays, holidays, party favors, teacher gifts, weddings, or craft fairs, this SVG gives you endless possibilities.
Get the SVG File

What Can You Make with This Hexagon Gift Box SVG?
One of the best things about this 3D gift box SVG is its versatility across different occasions.
These boxes can be used to create:
- Birthday gift boxes
- Wedding favor boxes
- Bridal shower party favors
- Baby shower treat boxes
- Christmas gift packaging
- Halloween treat boxes
- Retirement party favors
- Teacher appreciation gifts
- Pet-themed gift packaging
- Craft fair packaging
- Small handmade gift boxes
- Luminaries (only use with LED lights!)
Once you make one, you’ll have ideas for creating many more.
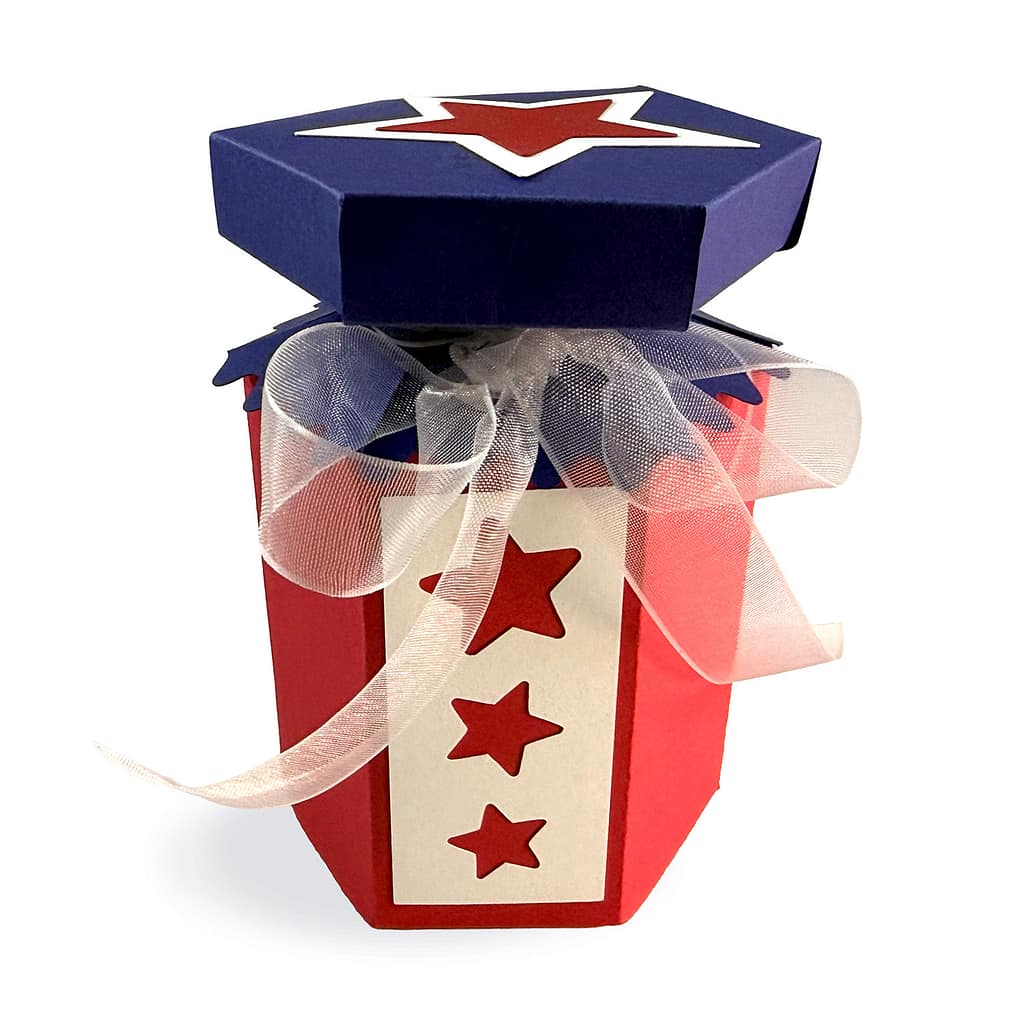
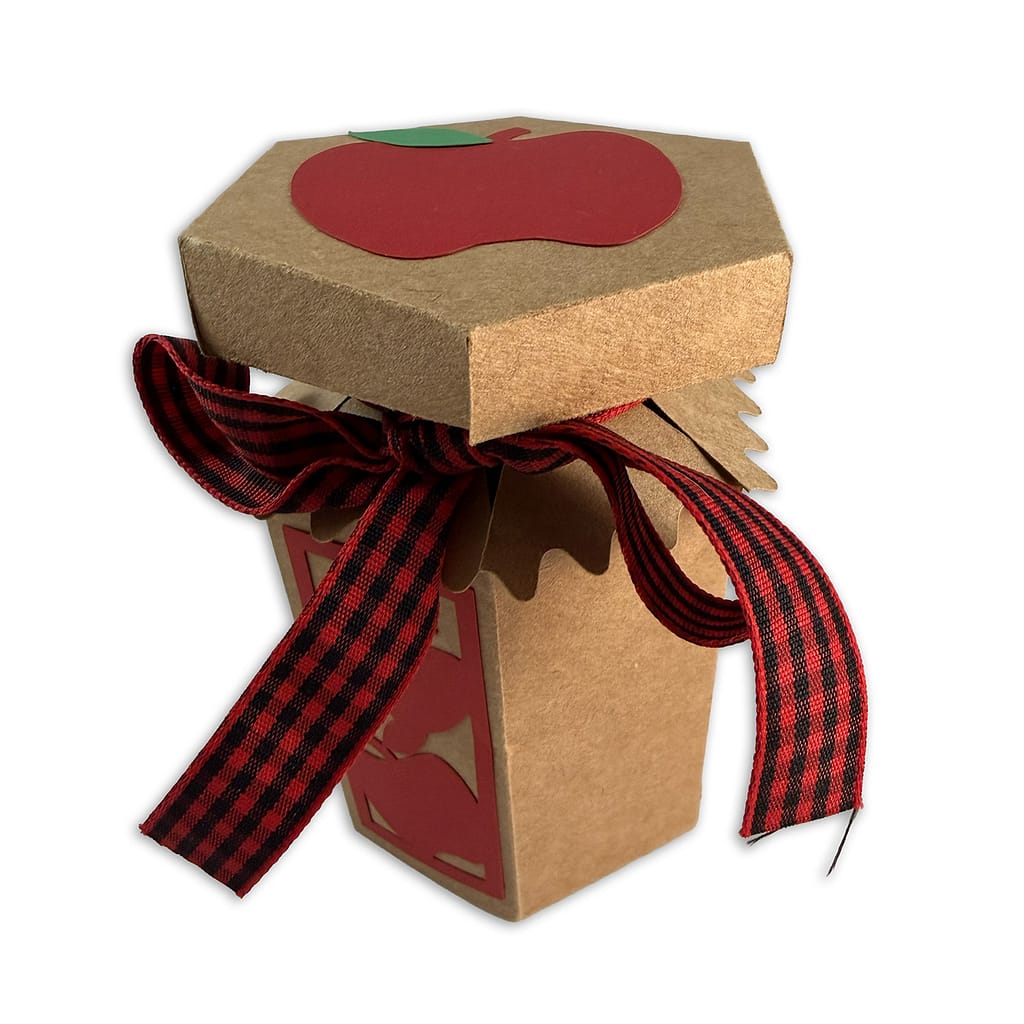
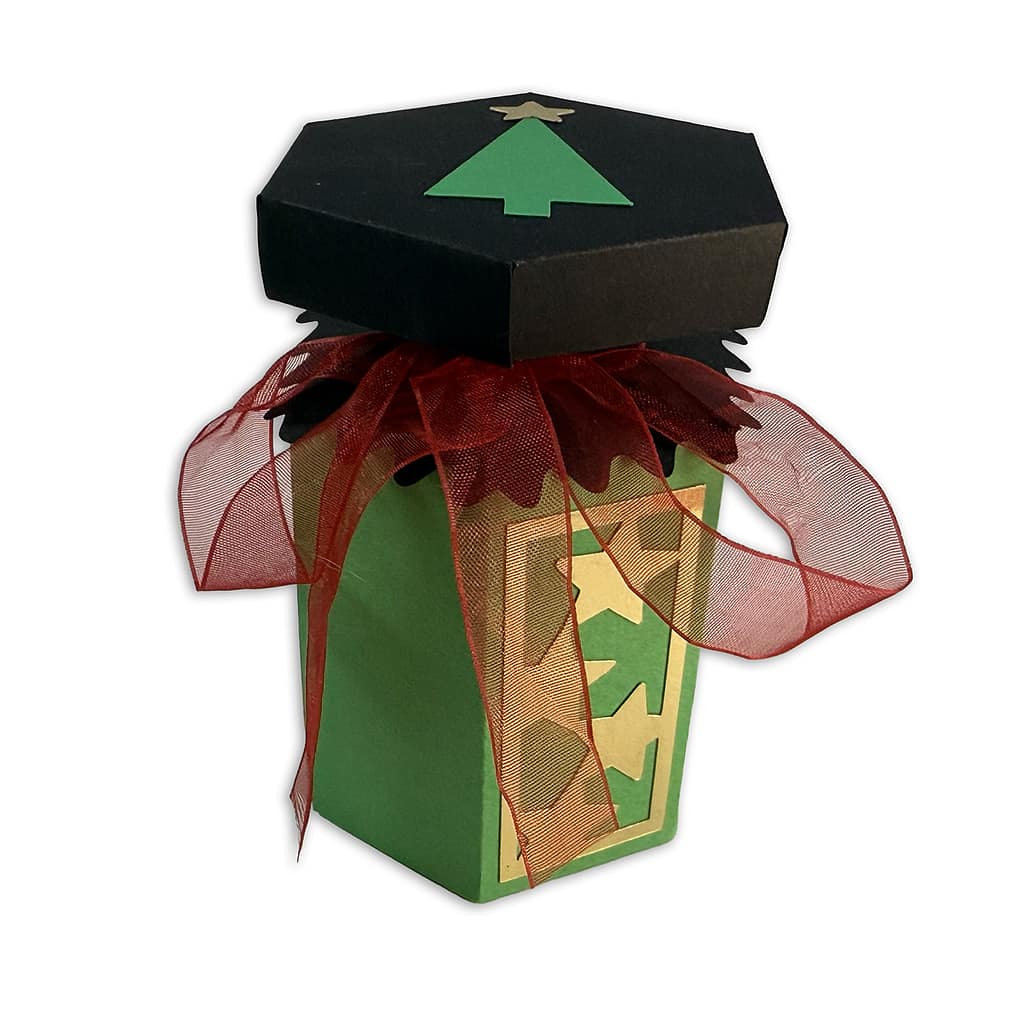
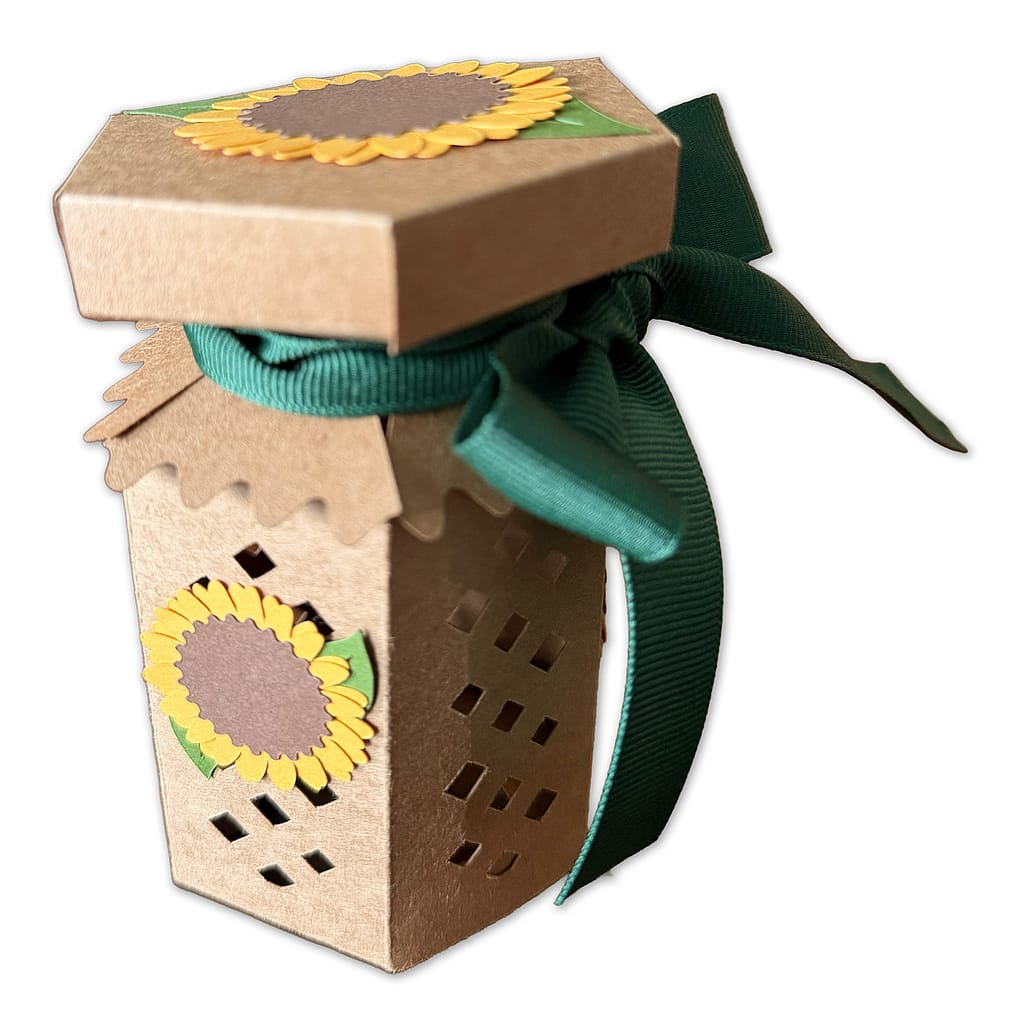
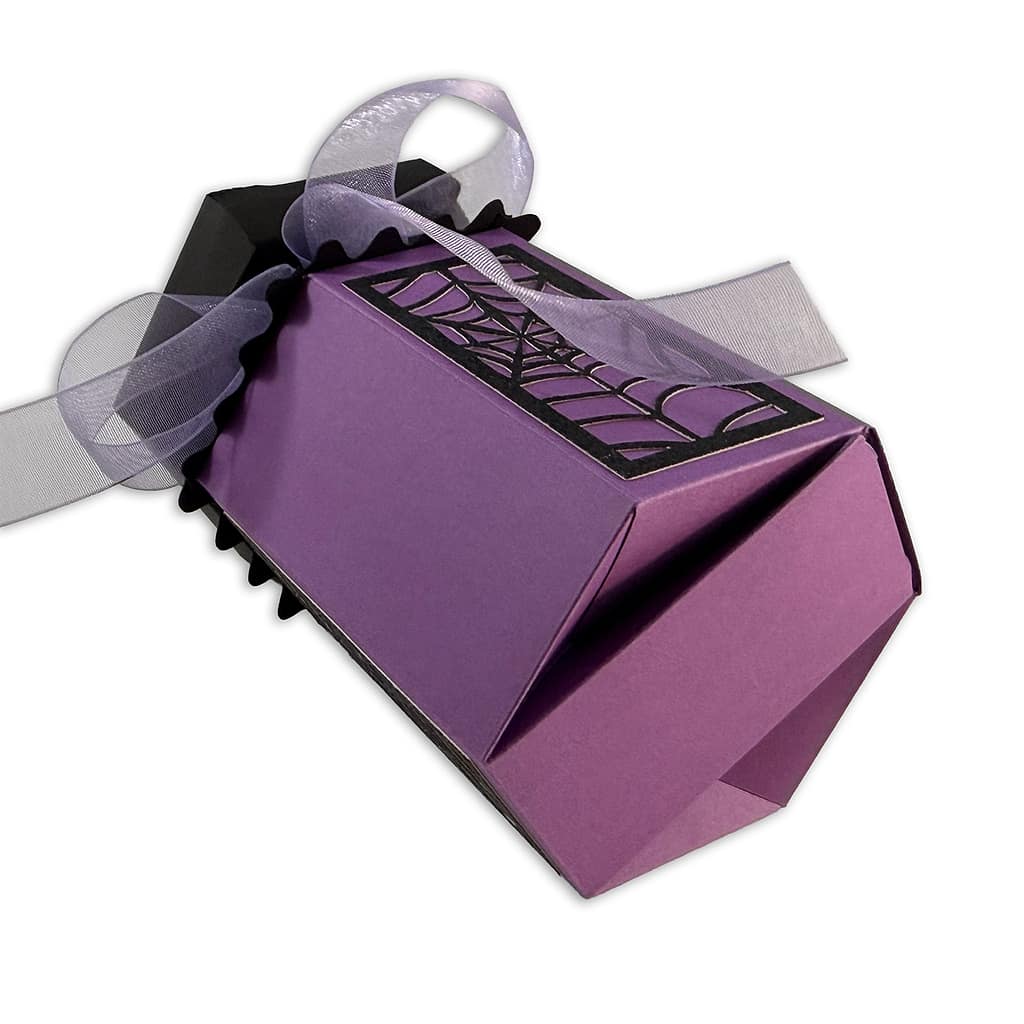
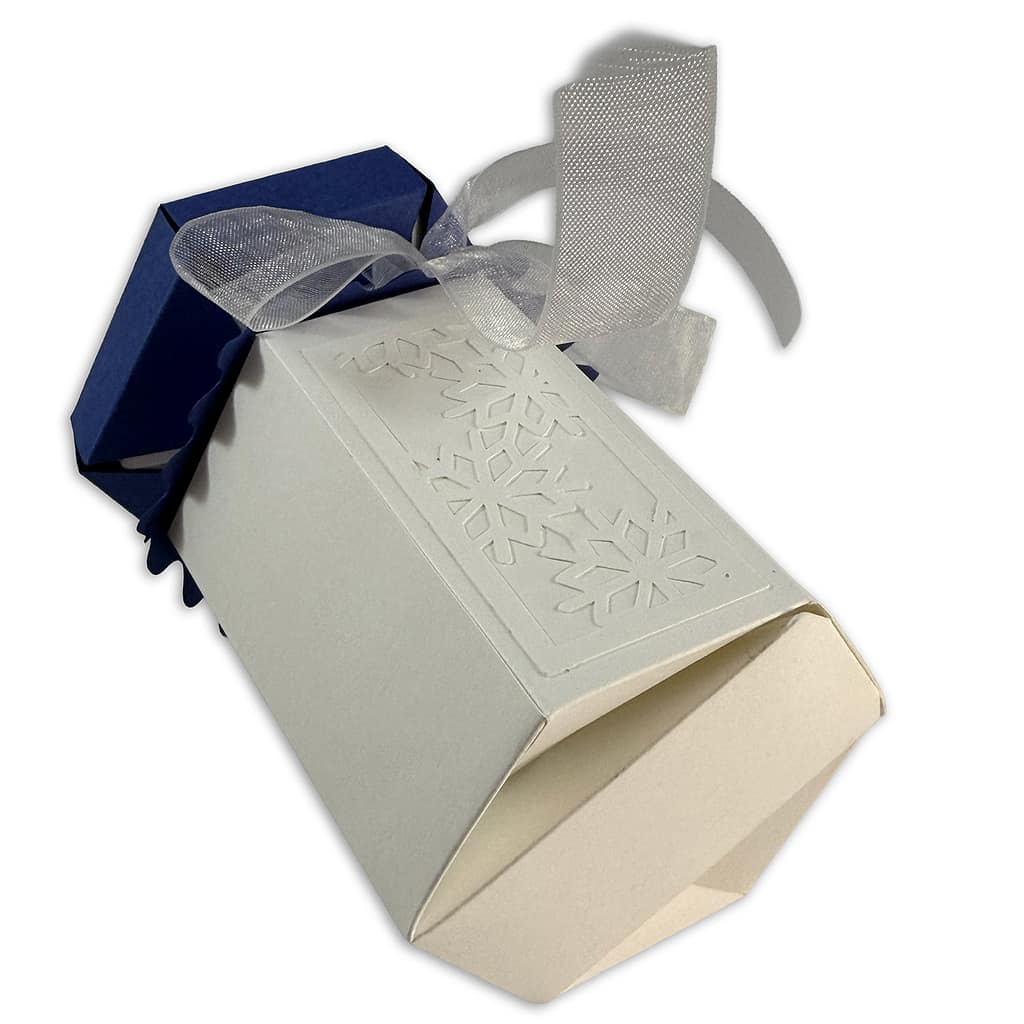
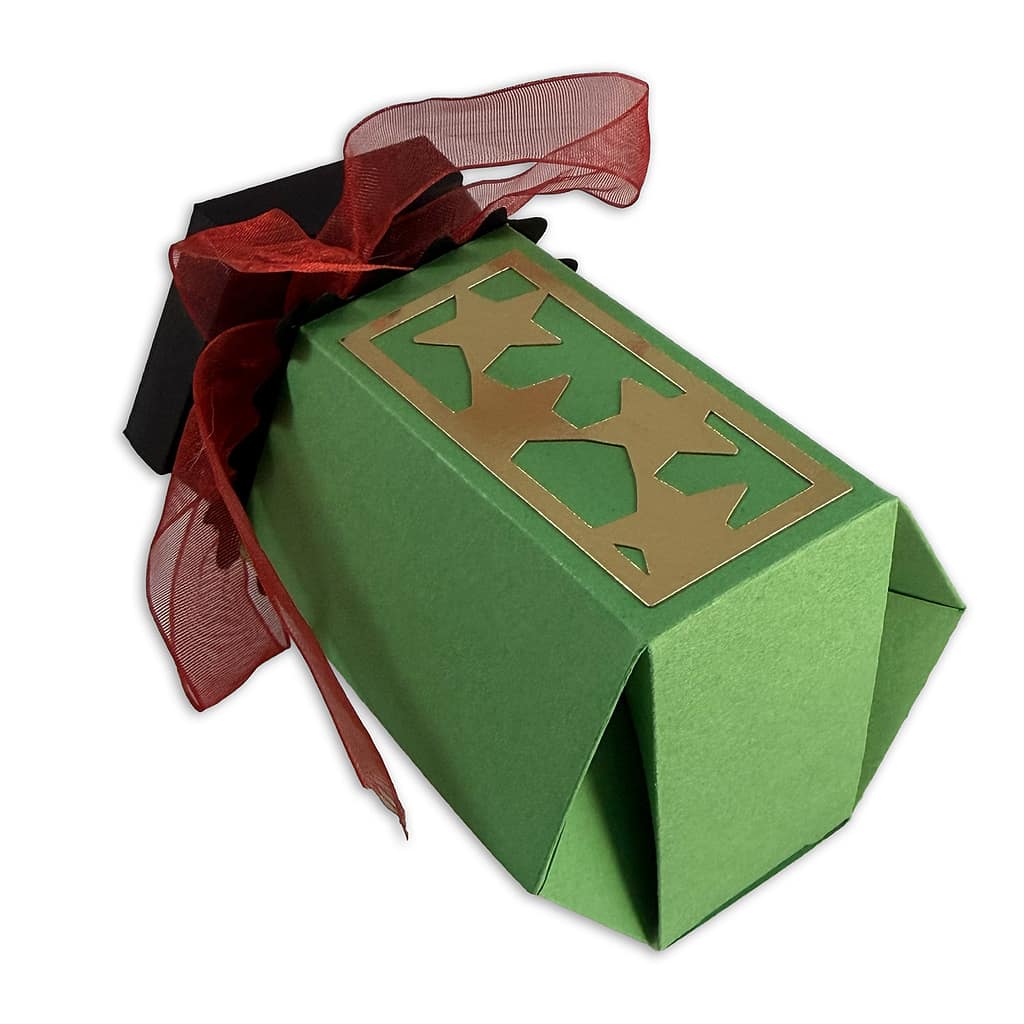
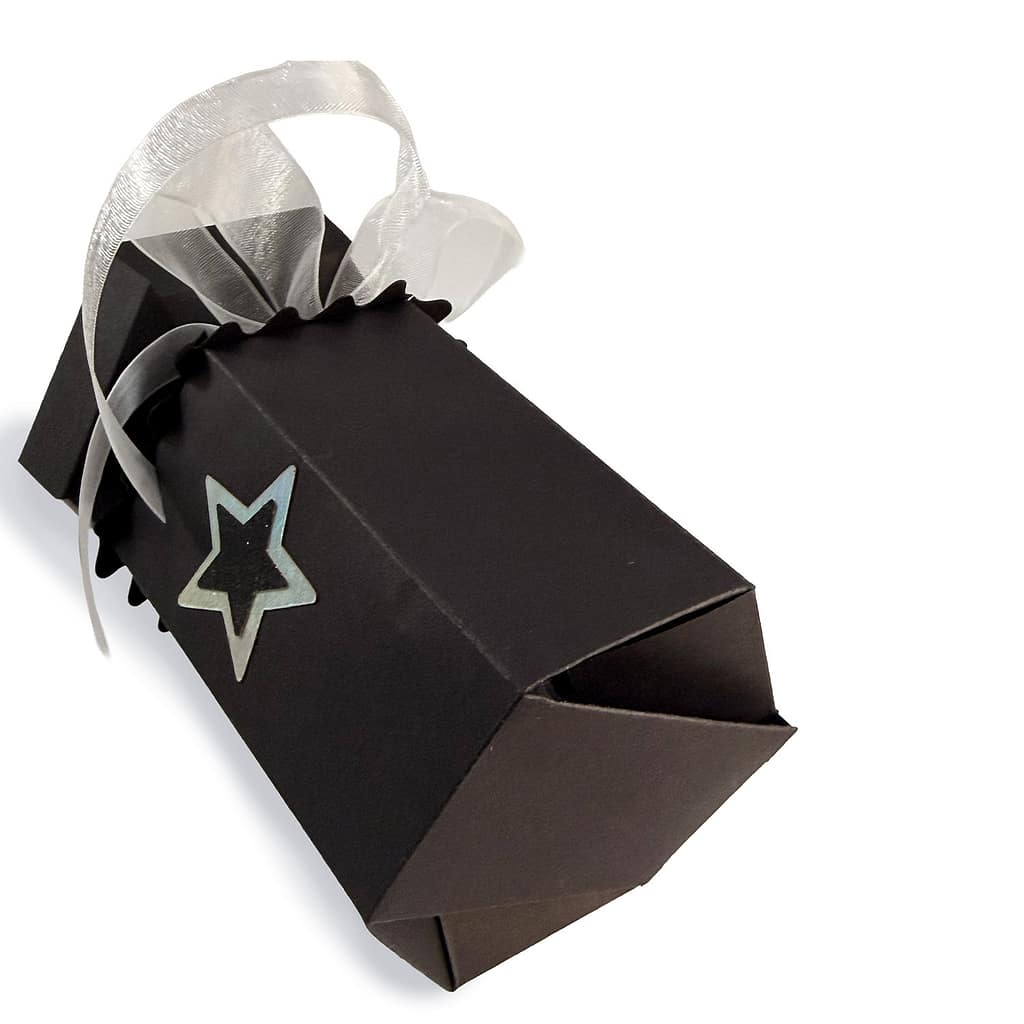
The examples shown here all use my SVGs and then are customized with ribbon, but you could use your creative juices to incorporate the treasures in your stash.

Supply List
- Cardstock (65–100 lb recommended)
- 24 inches of Ribbon (¼ – ⅝ inch) (Sheer/Organza, Satin, Gingham, Buffalo Check)
- Glue Pen, Squeeze and Roll
- Glue Pen, Fine Tip
- Tape Runner
- SVG-compatible cutting machine (Cricut Joy Xtra, Silhouette Cameo or similar)
- Optional: Scoring stylus, scoring wheel, or scoring tool appropriate for your cutting machine
- Optional: Bone folder
Find more of my favorite supplies on the Resources page or shop here.
Disclaimer: I may earn from qualified purchases made from the links on this page, at no additional cost to you. These earnings support this site and allow me to bring you more projects.
Assembling the Hexagon Gift Box
This Hexagon Gift Box SVG can be assembled in approximately 20–30 minutes, depending on how you choose to decorate it. The design is simple to assemble, and while assembling, you can decorate or customize it to add your unique touch.
In this tutorial, you will learn:
- How to assemble the Hexagon Gift Box
- Tips for achieving crisp folds and clean edges
- Adhesive recommendations
- Ways to embellish the design
Step 1: Cut Your SVG Pieces
Choose the file to use – Scored or Dashed
I have provided two different SVG files, depending on whether you will use score lines or dashed cut lines for the folds. Determine which file to use in your cutting machine software:
- If your machine does not support scoring, use the Silhouette file. It includes dashed cut lines to guide folding.
- If your machine supports scoring, use the Cricut file. This file contains score lines. When you import the SVG into your cutting machine software, select the scoring line layers on both the base and the top, and change the operation to Score.


Cut your pieces
Cut all pieces from your chosen cardstock using your SVG-compatible cutting machine.
The file includes:
- Hexagon gift box base
- Coordinating lid
- Decorative shapes and panels – If you do not want to cut these, be sure to hide them before cutting the base and lid. NOTE: To make the boxes as shown, I used 3 of the decorative panels. Make sure you cut enough of them to decorate the way you want.
Step 2: Prepare the Box Base

A. Fold the bottom flaps up.

B. Fold the upper edge down.

C. Fold the top section back halfway.

D. Fold the top edge down.

You should have a Z-fold shape on the top edge.

E. Fold the side glue tab inward.

F. Fold all vertical side panels, including the top end tab.
NOTE: It’s OK if you have to unfold them as you work.

NOTE: Make sure you fold the creases all the way down through the large bottom flap.

G. Fold the bottom tab down.
Fold along all score lines before applying adhesive. Take your time with this step, because well-creased folds make assembly much easier.
Now it’s time to decorate the outside of the box. It is easier to glue the panels and other decorations onto the box before gluing it together. These examples show how to decorate the sides of the themed boxes that I have available:


Step 3: Glue the Side Seam
It’s a good idea to dry-fit the pieces before applying the adhesive. This is especially important if you use tape, since you cannot reposition it.

A. Bring the box around into its hexagon shape. The side glue tab goes inside of the end panel.

B. Align the fold lines carefully.

Also, align the edge of the end panel with the side glue tab fold line. Lift the box slightly as you align the angled panels.

C. Apply adhesive only to the side glue tab, where it meets the end panel.
D. Secure the side glue tab to the end panel as you did in Step B and press firmly to secure it.
Step 4: Secure the Top End Tab

A. Apply adhesive to the lower portion of the decorative top end tab

B. Insert and align it with the surrounding folded edges.
C. Hold in place for a few seconds until secure. At this stage, the main structure of your gift box is assembled.
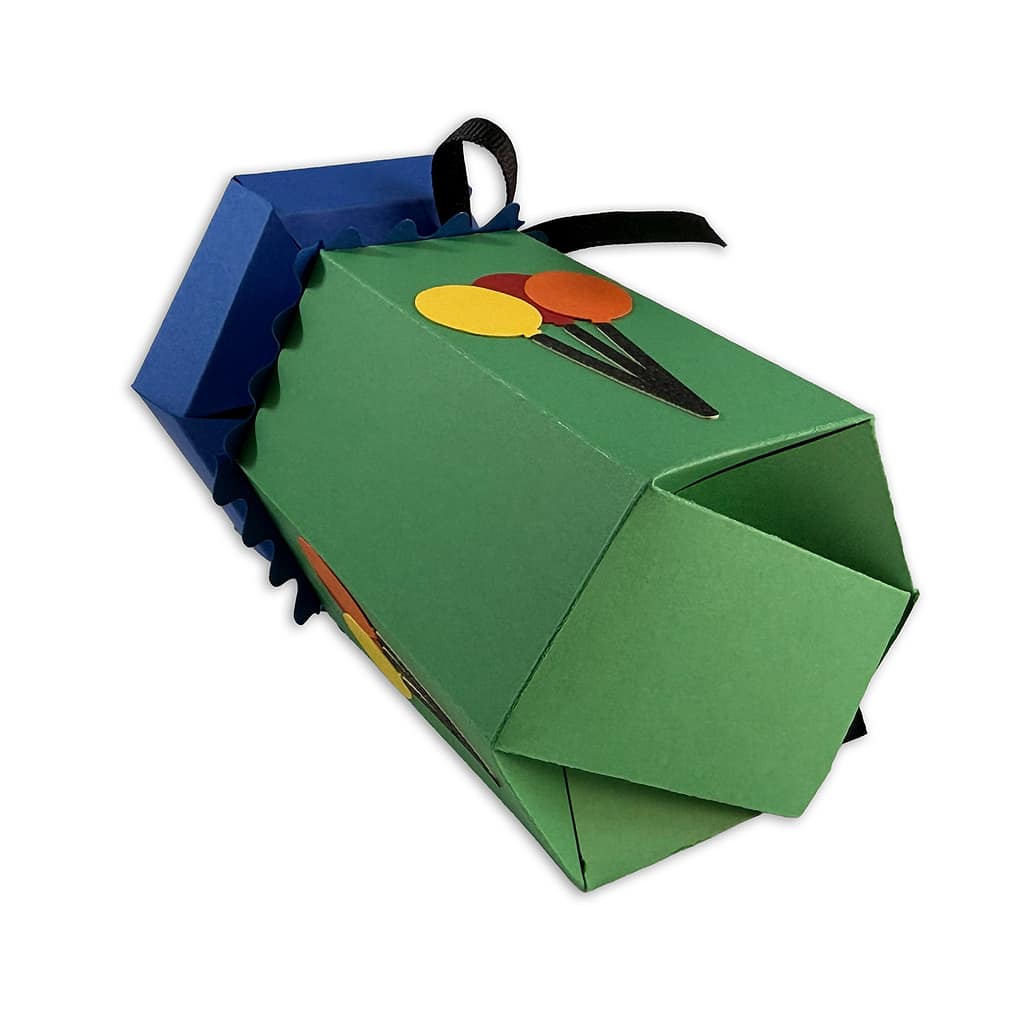
Step 5: Assemble the Bottom Closure
The bottom closure is designed to lock into place without glue. If you plan to add heavier contents, you can glue the bottom tab for extra strength.

A. Pre-crease the angled folds. Push the locking flap downward.

B. Align the notches with the angled openings inside the box. Allow the side flaps to fold inward naturally.

C. Tuck the locking tab securely into the slot. If the tab doesn’t slide in easily, gently adjust the folds until it seats properly.
Step 6: Assemble the Lid
The box can be used with or without the lid. If you are not using the lid, skip to step 7.

A. Take the lid piece and fold all outer edges downward to form the hexagon shape.

B. Fold each side in along the secondary score lines.

C. Fold the small inner sections outward. These folded sections create the flexible structure that allows the lid to fit neatly over the box.
Now it’s time to decorate the top of the box. It is easier to glue the decorations onto the box top before putting them on the box. Here is a list of how to decorate the tops of the themed boxes that are shown at the top of the page:
- Apple – Add the apple and the leaf.
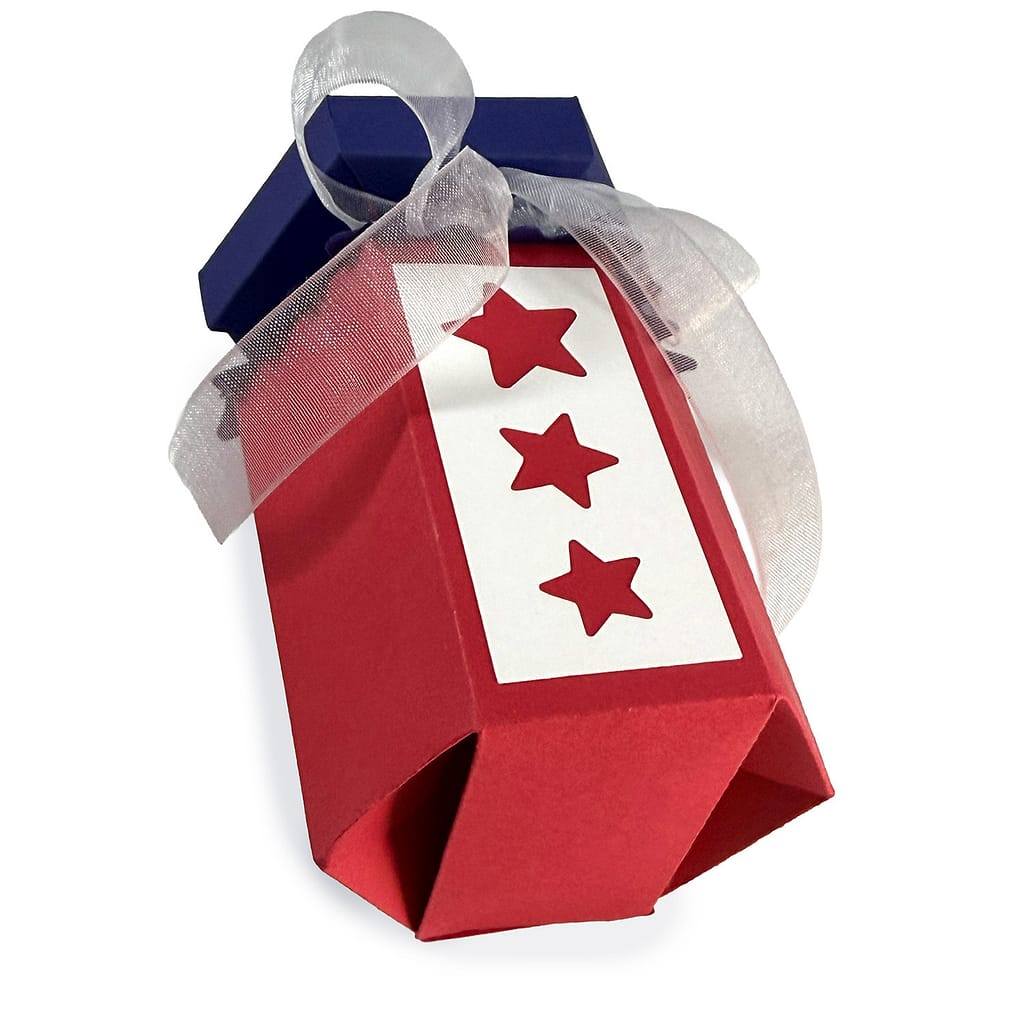
- Patriotic – Assemble the star and add it.
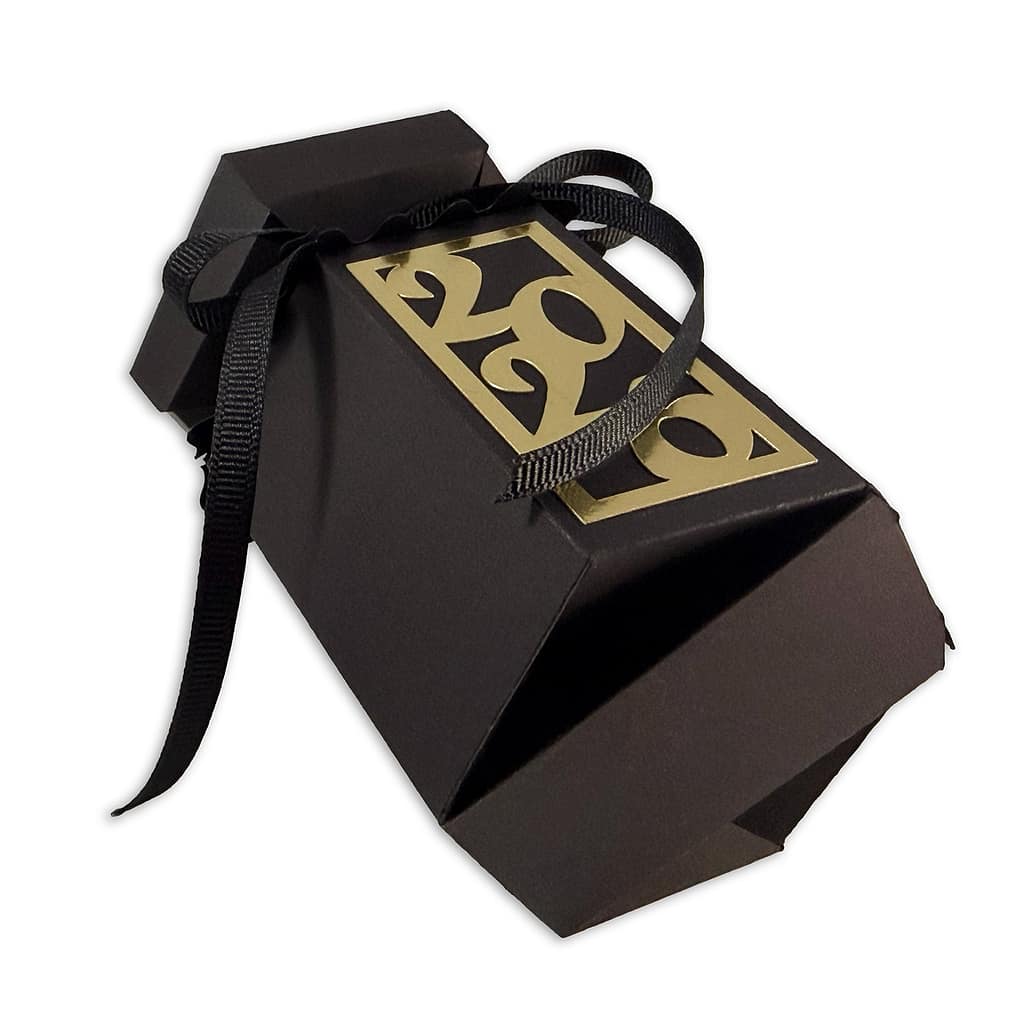
- Graduation – Assemble the cap and add it. I used black glitter cardstock and metallic gold cardstock.
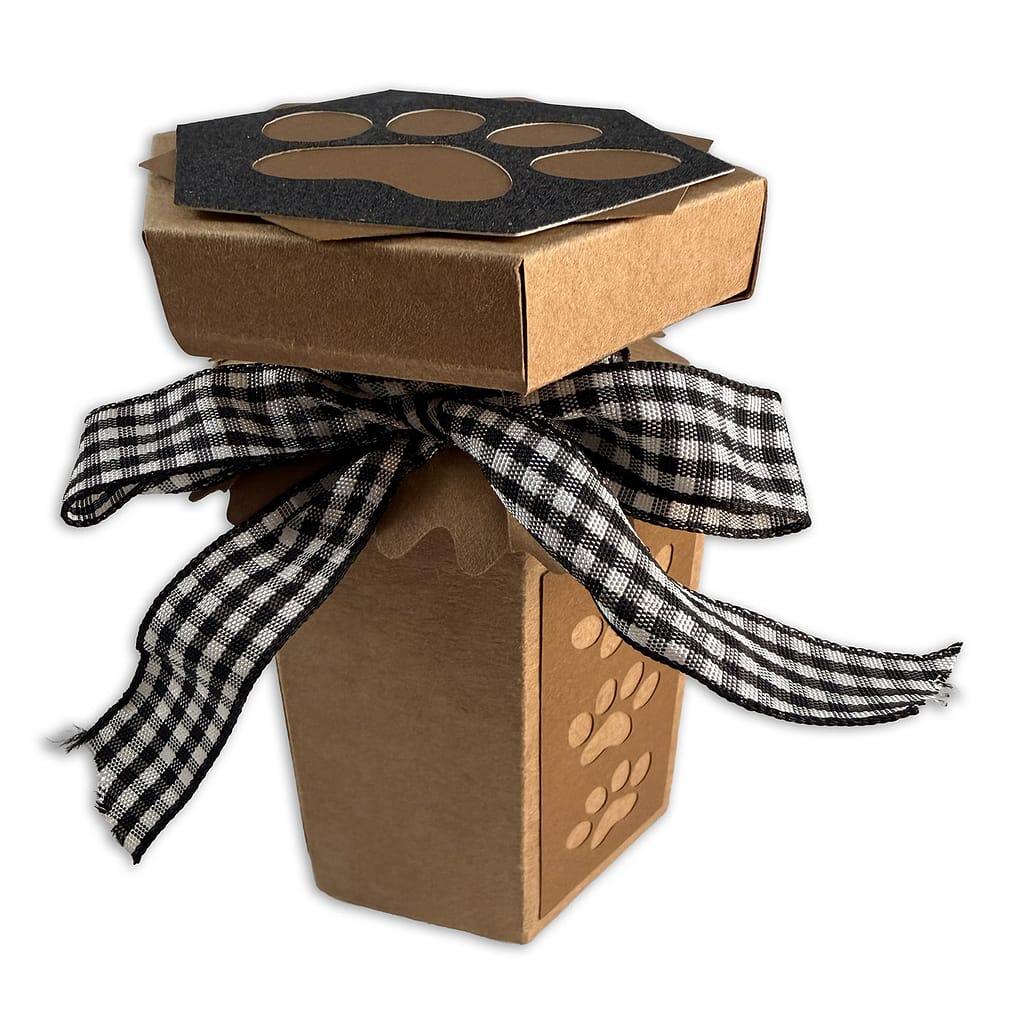
- Paw Print – Add the paw print cutout. I added a solid hexagon underneath it. I used black glitter cardstock for the paw print.
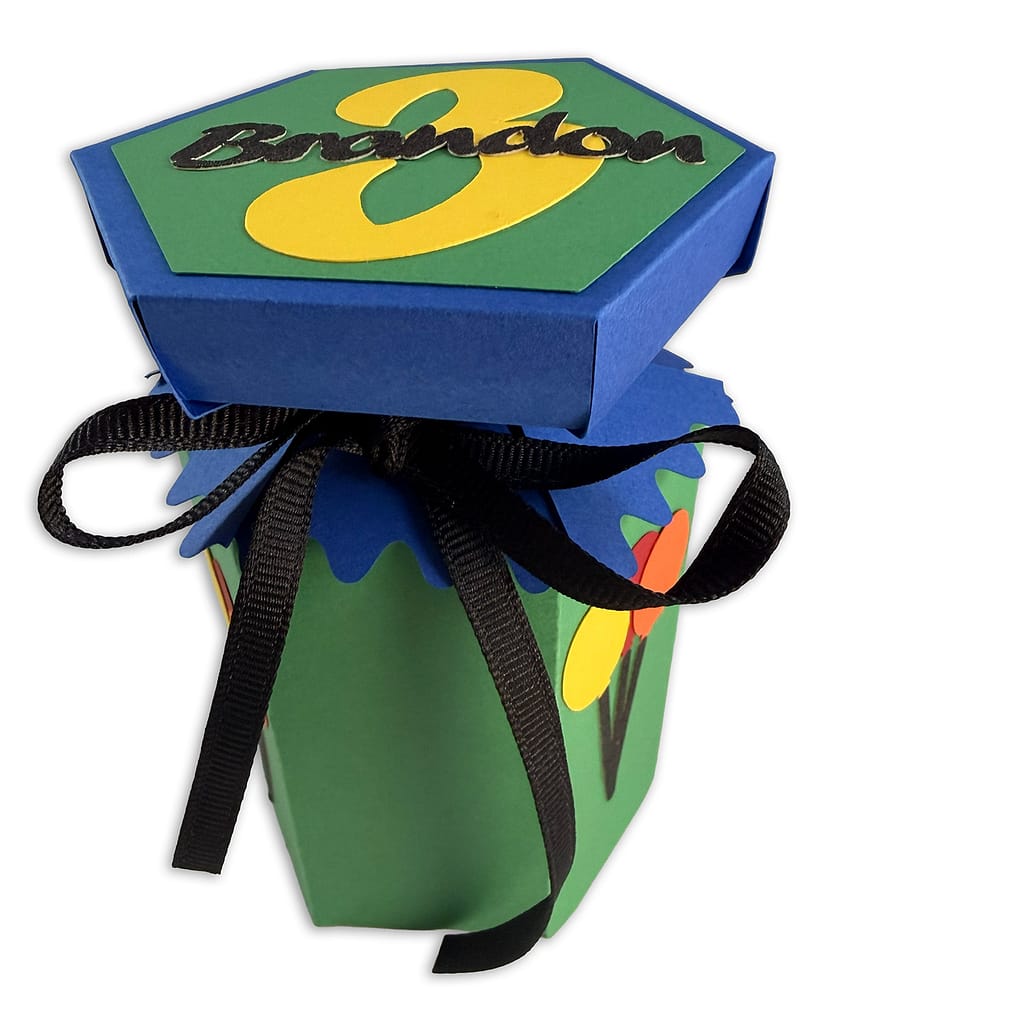
- Birthday – I used a solid hexagon and then cut out the number and the name of the birthday boy. I made the name in black glitter cardstock.
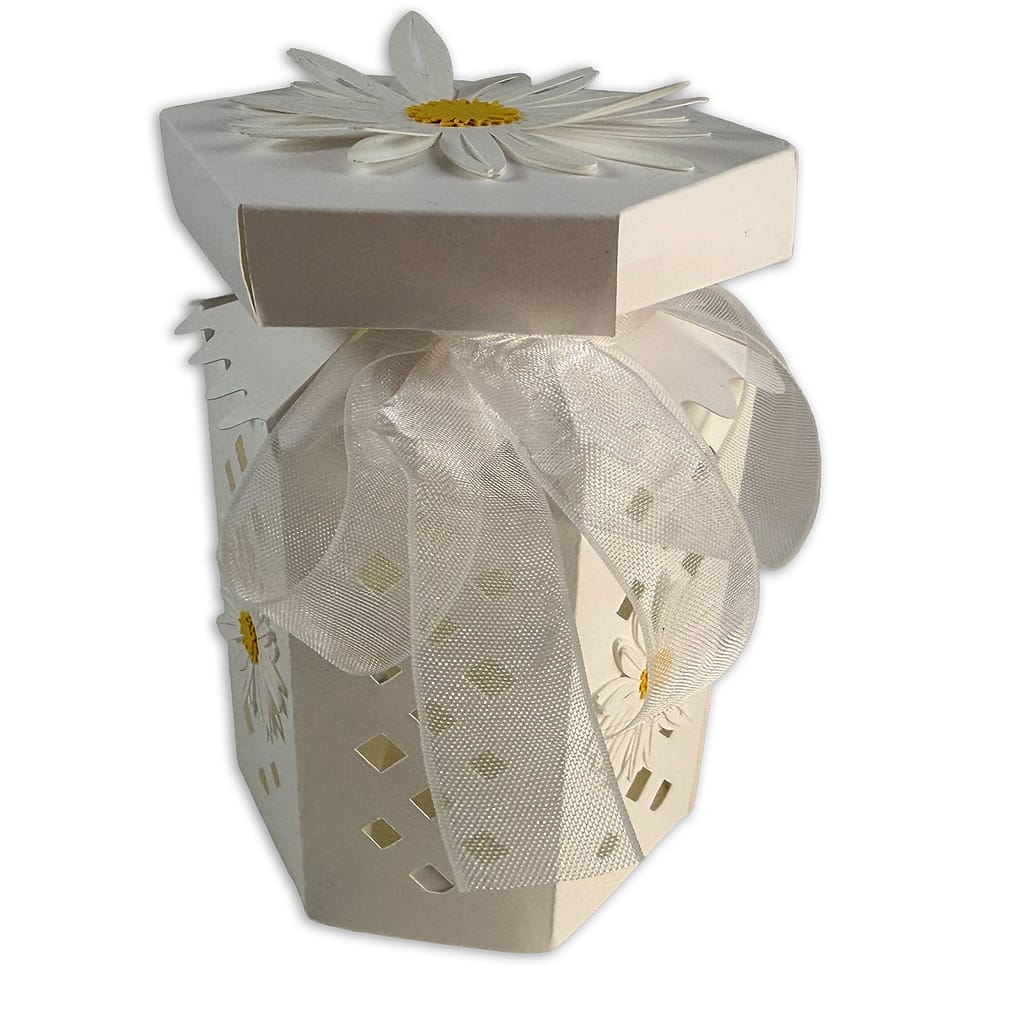
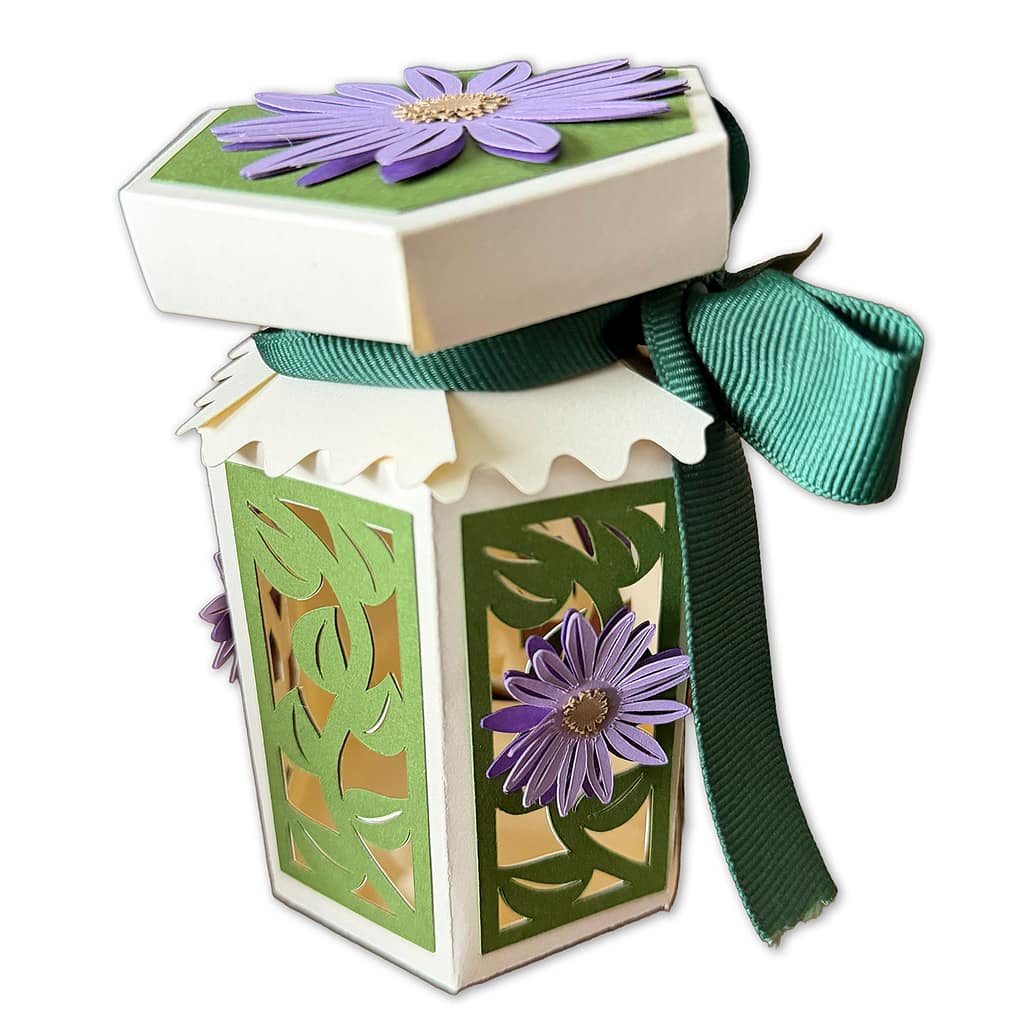
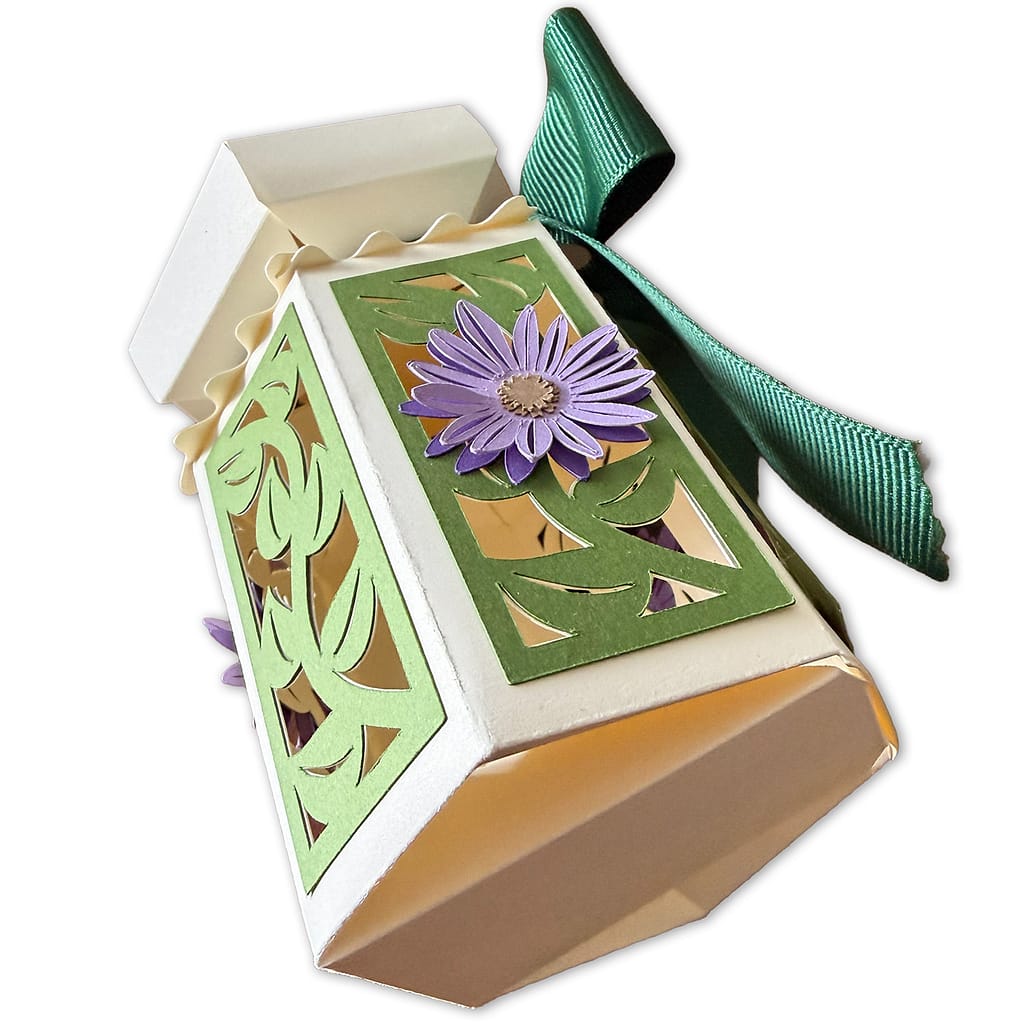
- Daisy Lattice – Assemble and add the flower.
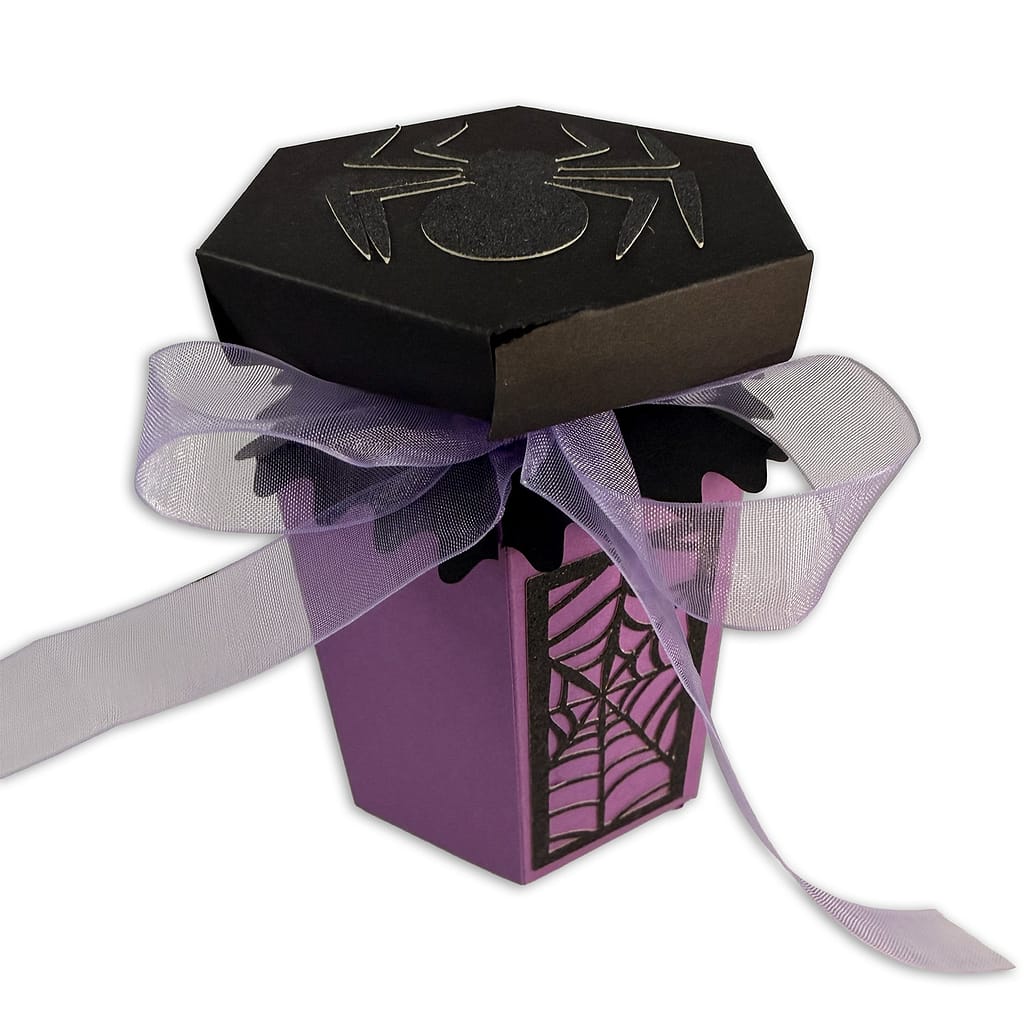
- Halloween Spider – Add the Spider. I used black glitter cardstock.
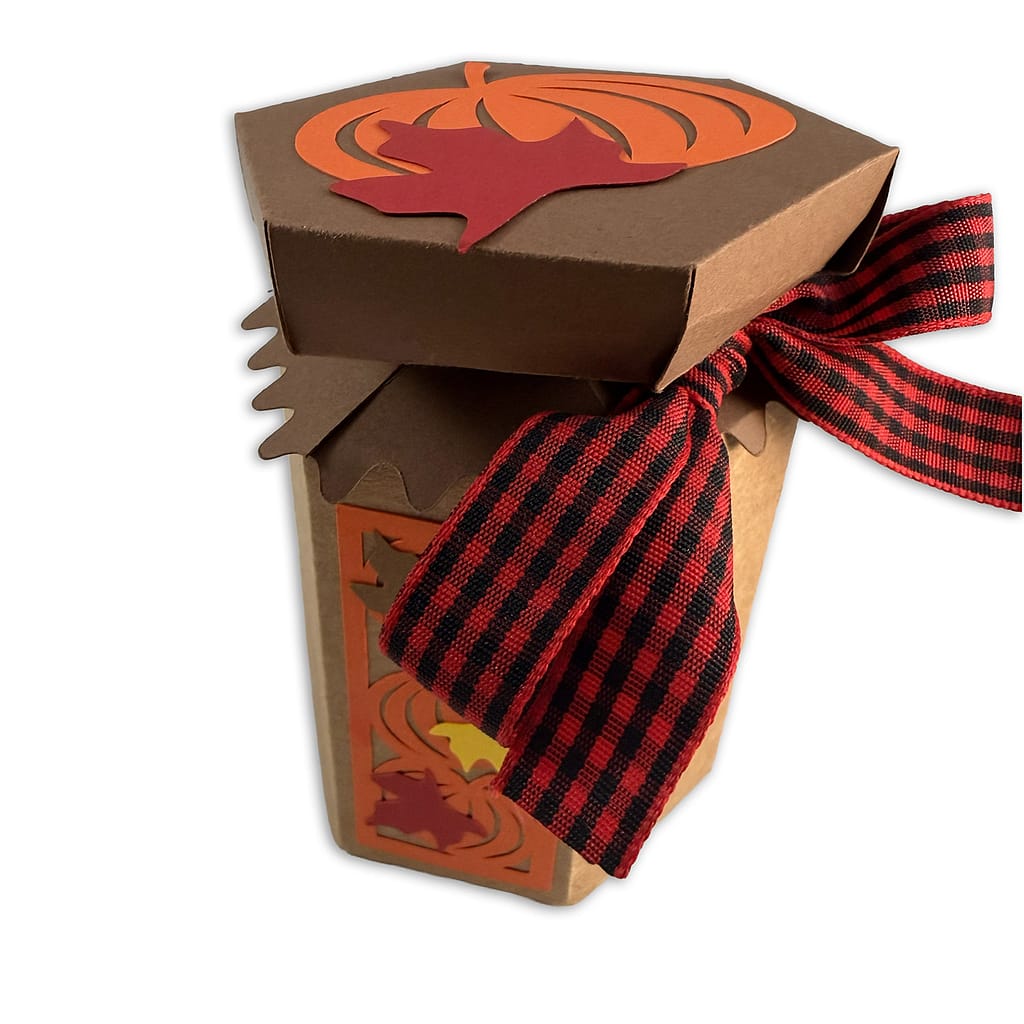
- Fall Pumpkin & Leaf – Add the pumpkin and attach the leaf.
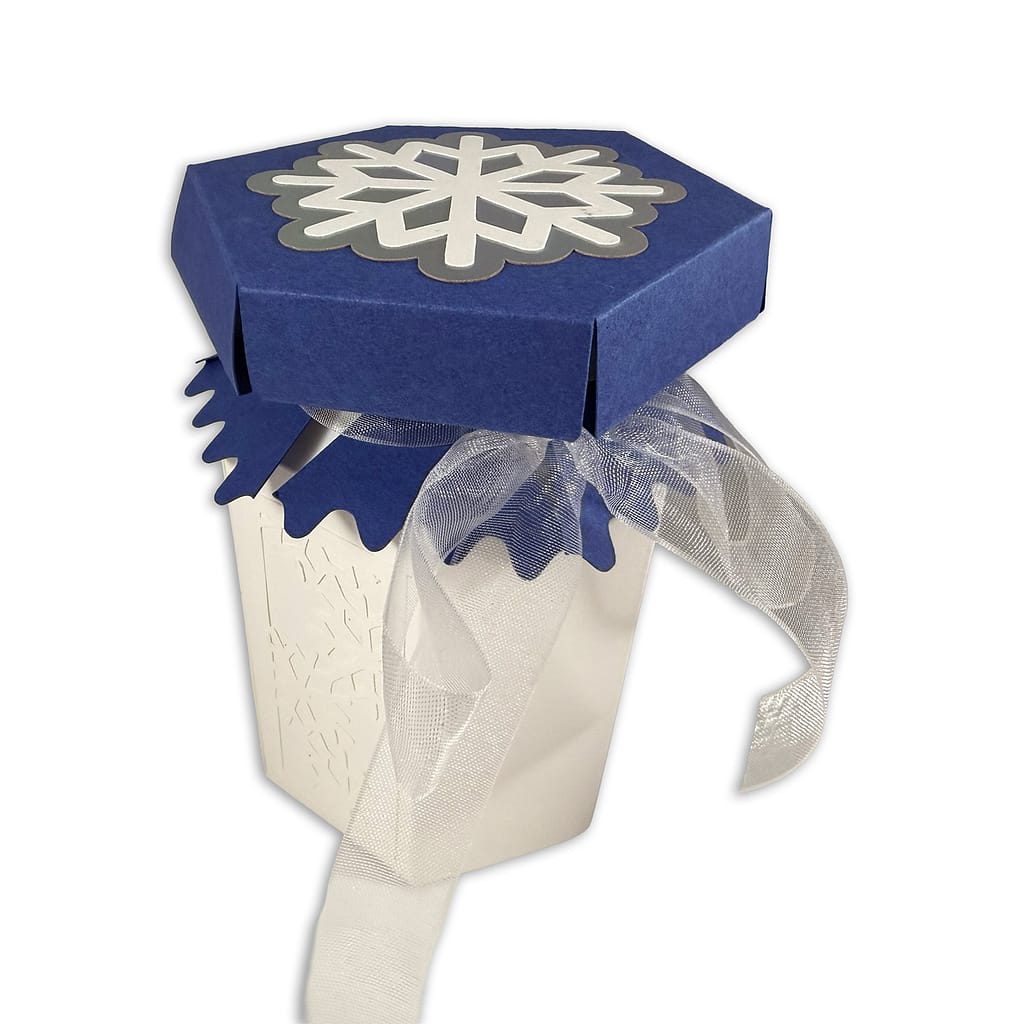
- Snowflake – Assemble the snowflake. I used holographic cardstock for the background.
- Christmas – Add the tree and star. I used metallic gold cardstock for the star.
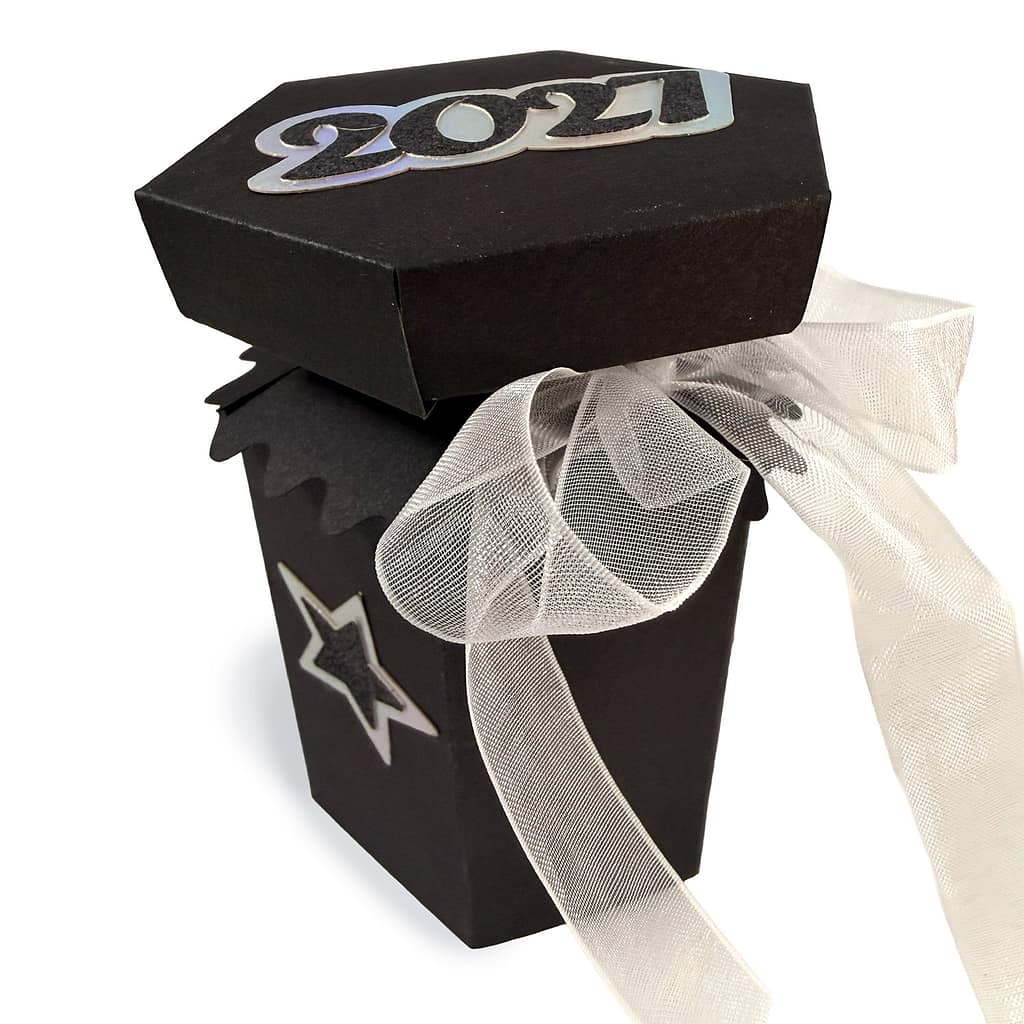
- New Year’s 2027 – Assemble and add the year. I used black glitter cardstock and holographic cardstock.
- Coneflower – Add the panel and assemble and add the flower.
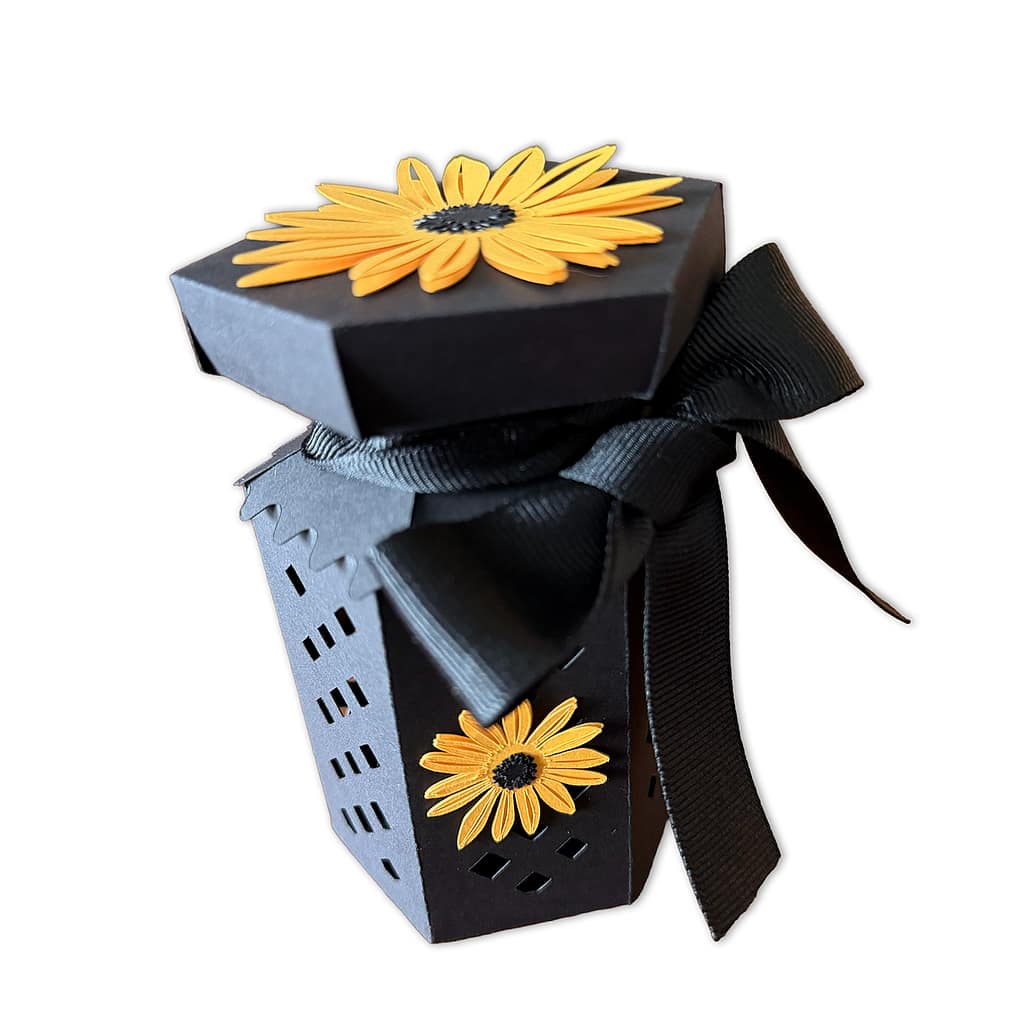
- Black Eyed Susan Lattice – Assemble and add the flower.
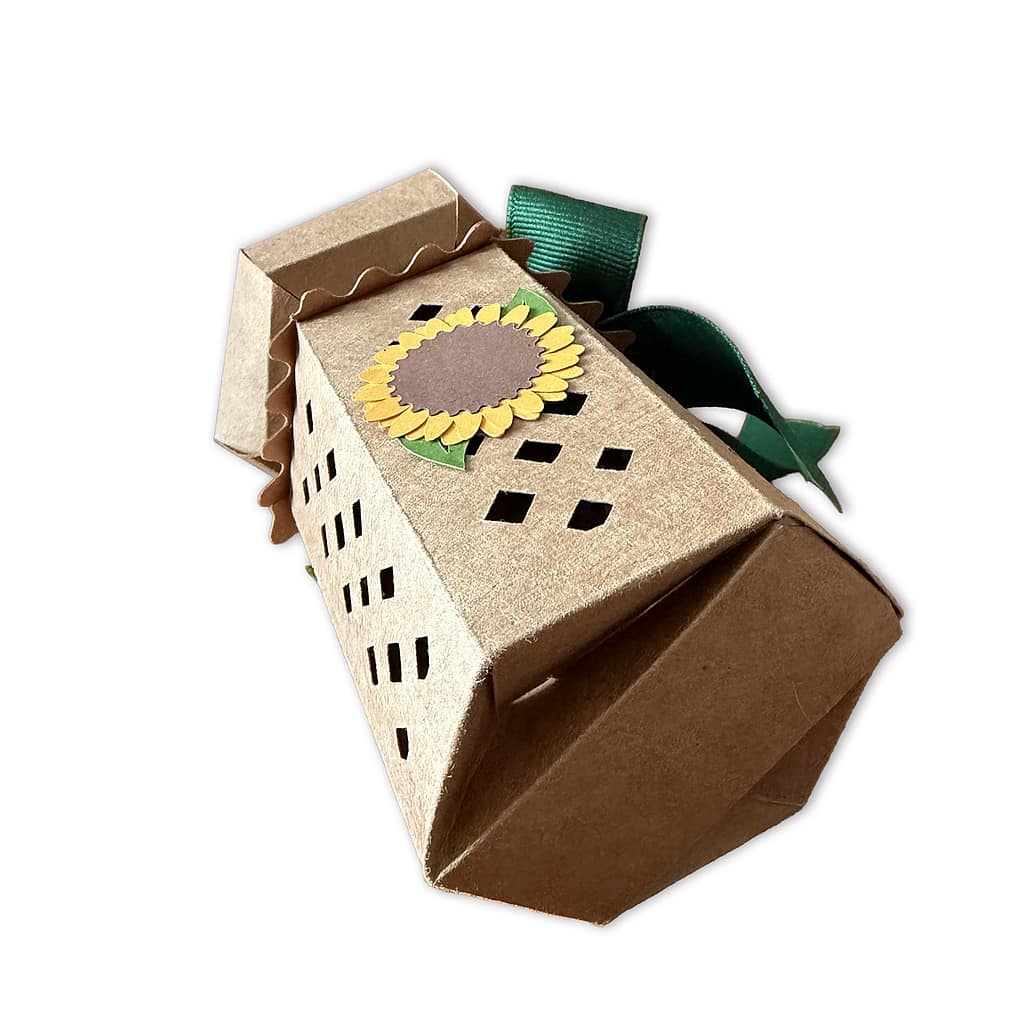
- Sunflower Lattice – Assemble and add the flower.
Make it your own! Use your stash and be creative!
Step 7: Add the Lid and Ribbon Closure
Place the lid on top of the assembled box, if you are using it. Wrap ribbon around the upper section and tie into a bow. The ribbon helps:
- Hold the lid securely in place
- Cinch the decorative collar
- Create a polished, finished look
For the default box size, approximately 24 inches of ribbon works well.

Helpful Tips
For cleaner folds
Use a scoring stylus, scoring wheel, or bone folder.
For a stronger assembly
Use liquid glue or strong double-sided adhesive.
For heavier gifts
Secure the bottom locking tab with adhesive.
For easy customization
Use the included decorative shapes as templates for creating your own themed versions.
Project Details
Design Name: Hexagon Gift Box SVG
Project Type: 3D Papercraft / Gift Packaging
Project Time: Approximately 20–30 minutes
Skill Level: Beginner to Intermediate
Assembly Required: Yes
File Format: SVG
Compatible Machines: Cricut, Silhouette, and other SVG-compatible cutters
Frequently Asked Questions
Why Make a Hexagon Gift Box?
A handmade gift box adds a thoughtful finishing touch that store-bought packaging simply can’t match.
This design is especially useful because it’s:
- Easy to assemble
- Beginner friendly
- Elegant and modern
- Reusable as a template idea
- Easy to customize
- Great for holidays and events
- Perfect for small gifts and treats
If you enjoy dimensional paper crafting, this is a project you’ll use again and again.
Is this Hexagon Gift Box SVG free?
The themed and decorated box SVGs are not free. They are available in my Etsy and Silhouette shops. I showed how to make the base Hexagon Gift Box at a University of Arts & Design – Design Smarter conference. You can access it and other great projects from my classmates, here.
Can I use this SVG with Silhouette cutting machines?
Yes, if you have Silhouette Studio Designer Edition or higher, which supports SVG files.
Can I use this SVG with Cricut Design Space?
Yes, the SVG file works with Cricut Design Space. However, the design is sized for 8 1/2 x 11 inch paper. If you are using a Cricut Joy, you would have to shrink the design in half to use it.
How long does this project take?
Most crafters can complete the basic Hexagon Gift Box in approximately 20–30 minutes, depending on embellishments.
Is this a beginner-friendly papercraft project?
Yes. The design is approachable for beginners while still offering lots of room for creative customization.
Can I sell this box design?
This design comes with a limited commercial-use license for small businesses. You can sell the physical items you make with this SVG. You cannot sell the SVG or any of my digital files. Please see the licensing terms included in the zip file with the SVG.
More SVG Papercraft Designs
If you enjoy 3D paper crafting, you may also love my other designs for:
- Layered greeting cards
- Seasonal SVG projects
- Gift packaging
- Decorative layered designs
If you like this SVG, make sure you sign up to access the free designs in my freebie library. You can also find more designs like these in my online shops.
")